✓ Most fresh herbs benefit from refrigeration, but the method varies by type (tender vs. woody).
✓ Proper storage can extend the life of fresh herbs from a few days to several weeks.
✓ Washing herbs just before use, not before storage, is generally recommended to prevent spoilage.
✓ Drying or freezing are excellent long-term preservation methods for surplus herbs.
How It Works
1
Identify Herb Type
Determine if your herb is tender (e.g., basil, cilantro) or woody (e.g., rosemary, thyme) as storage methods differ. This initial step is crucial for selecting the most effective preservation technique.
2
Prepare for Storage
Trim stems, remove damaged leaves, and decide whether to wash immediately or just before use. Avoid excessive moisture, which can accelerate spoilage.
3
Apply Specific Method
Employ the correct storage technique for your herb: water and plastic bag for tender herbs, damp paper towel for others, or specialized containers. This ensures optimal conditions for freshness.
4
Monitor and Maintain
Regularly check herbs for signs of spoilage and change water or paper towels as needed. Consistency in maintenance is key to maximizing their shelf life.
Understanding Herb Types: The First Step to Extended Freshness
Photo: SHVETS production / Pexels
The journey to mastering how to store fresh herbs longer begins with a fundamental understanding of the two main categories: tender and woody. This distinction is not merely botanical; it dictates the most effective preservation strategy, allowing you to maximize their vibrant flavor and aroma in your cooking. Tender herbs, characterized by their soft, pliable stems and delicate leaves, include popular choices like basil, cilantro, parsley, mint, tarragon, and dill. These herbs are highly susceptible to wilting and bruising, and their cell structure makes them prone to absorbing excess moisture or drying out quickly. Their delicate nature means they require a more gentle and often humid environment for storage. For example, basil, famously sensitive to cold, will blacken if stored improperly in the refrigerator, while cilantro and parsley thrive with their stems in water, much like a bouquet of flowers. Understanding these nuances is critical to preventing premature spoilage and ensuring they remain flavorful for your dishes. Discover more about specific herb characteristics here.
On the other hand, woody herbs boast tougher, often thicker stems and more robust leaves. This category encompasses rosemary, thyme, oregano, sage, and chives. Their more durable structure makes them less prone to wilting and generally more resilient to varying storage conditions. While they still benefit from proper care, they typically don't require the same level of humidity or water bath treatment as their tender counterparts. Their essential oils are often more concentrated, meaning they retain their flavor profile for longer, even if they appear slightly drier. However, they are not immune to spoilage; prolonged exposure to dry air can cause them to become brittle and lose potency. The key to preserving woody herbs lies in preventing dehydration without introducing excessive moisture that could lead to mold. By correctly identifying whether your herb is tender or woody, you lay the groundwork for choosing the optimal storage technique, thereby significantly extending its freshness and reducing food waste in your kitchen. This foundational knowledge empowers you to treat each herb with the specific care it needs, ensuring peak flavor for every meal.
Optimal Refrigerator Storage Methods for Tender Herbs
Photo: Ella Olsson / Pexels
For tender herbs like cilantro, parsley, basil, mint, and dill, the refrigerator is usually your best friend, but the method is crucial for how to store fresh herbs longer. The goal is to mimic their natural growing environment: a humid, yet not overly wet, setting. The most effective technique often involves treating them like a fresh bouquet of flowers. First, carefully inspect your herbs and remove any yellowed, bruised, or damaged leaves. These can accelerate spoilage for the entire bunch. Next, trim about half an inch off the bottom of the stems. This fresh cut allows the herbs to absorb water more efficiently, much like cut flowers. Place the trimmed stems into a small glass or jar filled with an inch or two of water. Ensure that only the stems are submerged, not the leaves, as wet leaves can lead to rot. Once in the water, loosely cover the entire setup – the glass and the herbs – with a plastic bag. A clear plastic produce bag works perfectly, or you can use a plastic cling film. This creates a mini-greenhouse effect, trapping humidity around the leaves and preventing them from drying out, while the water keeps the stems hydrated. Place this covered arrangement in the refrigerator. For basil, however, there's a slight but significant deviation: basil is highly sensitive to cold and can blacken quickly in the fridge. For basil, follow the same water-in-a-jar method, but leave it on the countertop at room temperature, away from direct sunlight. Change the water every day or two for all tender herbs to prevent bacterial growth and ensure continuous hydration. This method can keep most tender herbs fresh and vibrant for one to two weeks, sometimes even longer, significantly extending their usability compared to simply tossing them in a drawer. Regularly checking and refreshing the water is a small effort that yields significant returns in terms of herb longevity and flavor preservation.
Maximizing Shelf Life: Best Practices for Woody Herbs and Beyond
Photo: Max Bonda / Pexels
Woody herbs, with their sturdier stems and robust leaves, require a different approach to truly master how to store fresh herbs longer. Herbs such as rosemary, thyme, oregano, and sage are less prone to wilting in the same way tender herbs do, but they can still dry out and lose their potency if not stored correctly. The most effective method for these varieties involves a damp paper towel. Begin by gently washing the herbs if they appear dirty, but ensure they are thoroughly dry before storage. Excess moisture is the enemy of all herbs in storage, as it promotes mold and bacterial growth. You can use a salad spinner or carefully pat them dry with a clean kitchen towel. Once dry, gather a small bunch of the woody herbs and wrap them loosely in a slightly damp paper towel. The dampness provides just enough humidity to prevent drying without creating an overly wet environment. Place this wrapped bundle inside a resealable plastic bag or an airtight container. The container or bag acts as a barrier, preventing the paper towel from drying out too quickly and maintaining a consistent level of moisture around the herbs. Store this in the crisper drawer of your refrigerator. This technique can keep woody herbs fresh and fragrant for two to three weeks, sometimes even longer, allowing you ample time to use them in various dishes. Explore other long-term food preservation techniques here.
Beyond refrigeration, consider the freezer for long-term storage of both tender and woody herbs. Freezing is an excellent option for when you have an abundance of herbs and want to preserve their flavor for months. One popular method is to chop the herbs finely and pack them into ice cube trays. Cover the chopped herbs with a neutral oil, such as olive oil, or water, and then freeze. Once frozen, pop out the herb cubes and transfer them to a freezer-safe bag or container. These herb cubes are perfect for adding directly to soups, stews, sauces, and sautés, melting directly into your dish and infusing it with fresh herb flavor. Another freezing technique involves simply spreading whole or chopped herbs in a single layer on a baking sheet, freezing them until solid, and then transferring them to a freezer bag. This 'flash freezing' prevents them from clumping together, allowing you to grab just the amount you need. While frozen herbs may lose some of their textural integrity, their flavor remains largely intact, making them a fantastic option for cooked dishes where texture is less critical. These diverse strategies ensure that no matter the herb type or your quantity, you have a reliable method to extend its culinary life.
Essential Tips and Common Mistakes to Avoid for Herb Longevity
Achieving maximum longevity for your fresh herbs goes beyond just the storage method; it involves a holistic approach to handling and preparation. By understanding common pitfalls and adopting best practices, you can significantly improve how to store fresh herbs longer. Here are some essential tips and mistakes to steer clear of:
* **Don't Wash Until Ready to Use (Mostly):** While some methods call for light washing, a general rule of thumb, especially for woody herbs and tender herbs stored dry, is to wash them just before you're about to cook with them. Excess moisture on the leaves is a prime catalyst for mold and rot. If you must wash them beforehand, ensure they are thoroughly dried, ideally with a salad spinner or by patting them gently with a paper towel, before storing.
* **Avoid Overcrowding:** When storing herbs in jars with water or in bags, ensure they have enough space. Overcrowding can lead to poor air circulation, which can trap moisture and encourage spoilage. Give your herbs room to breathe.
* **Change Water Regularly:** For herbs stored in water, commit to changing the water every one to two days. Stagnant water can quickly become a breeding ground for bacteria, which will rapidly degrade your herbs.
* **Inspect Regularly:** Make it a habit to check your stored herbs every couple of days. Remove any leaves that show signs of wilting, discoloration, or mold. A single bad leaf can quickly contaminate the rest of the bunch.
* **Consider Herb-Specific Needs:** Remember basil's aversion to cold. While most tender herbs go in the fridge in water, basil prefers room temperature. Ignoring these specific needs is a common mistake that leads to premature spoilage.
* **Don't Store Near Ethylene-Producing Fruits:** Some fruits, like apples, bananas, and tomatoes, release ethylene gas, a natural ripening agent. Storing sensitive herbs near these fruits can accelerate their spoilage. Keep your herbs in a separate part of the refrigerator or away from your fruit bowl.
* **Utilize Air-Tight Containers for Dry Storage:** If you're storing woody herbs in a damp paper towel, ensure they are then placed in an airtight container or a sealed plastic bag. This prevents the paper towel from drying out and maintains a consistent, humid environment.
* **Label and Date:** Especially when freezing herbs, always label your containers or bags with the type of herb and the date it was stored. This helps you keep track of freshness and ensures you use them within their optimal timeframe, typically 3-6 months for frozen herbs.
By implementing these simple yet effective tips and consciously avoiding common mistakes, you'll find yourself wasting fewer herbs and enjoying their fresh, vibrant flavors in your cooking for much longer periods. This mindful approach to herb care is a hallmark of an efficient and resourceful kitchen.
Comparison
Feature
Tender Herbs (Water Bath)
Woody Herbs (Damp Paper Towel)
Freezing (Oil/Water Cubes)
Drying (Air/Dehydrator)
Initial Prep
Trim stems, remove bad leaves
Wash & dry thoroughly
Wash, chop
Wash, dry, destem
Storage Container
Glass of water, plastic bag
Plastic bag/airtight container
Ice cube tray, freezer bag
Airtight jar
Shelf Life
1-2 weeks
2-3 weeks
3-6 months
6-12 months
Ideal Use
Fresh garnish, salads
Cooking, roasting
Soups, stews, sauces
Rubs, long-cook dishes
Flavor Retention
High
High
Good (texture loss)
Good (concentrated)
Effort Level
Medium
Low
Medium
High (initial)
Best for Basil?
✗ (room temp only)
✗
✓
✓
What Readers Say
★★★★★
"This guide completely changed how I store my herbs! My cilantro used to wilt in days, but now with the water-and-bag method, it stays fresh for almost two weeks. Such a game-changer for my weekly meal prep."
Sarah J. · Austin, TX
★★★★★
"I always struggled with basil, but the tip about keeping it on the counter in water was revolutionary. No more black, slimy basil! My pesto has never been better thanks to these insights on how to store fresh herbs longer."
Mark D. · Chicago, IL
★★★★★
"Following these storage tips has cut my herb waste by at least 75%. I'm saving money and always have fresh ingredients on hand. The detailed instructions for each herb type are incredibly helpful and easy to follow."
Emily R. · Seattle, WA
★★★★★
"The methods work well, especially for my rosemary and thyme. I do wish there was a bit more emphasis on what to do if herbs are already slightly wilted when purchased, but overall, a very solid resource for how to store fresh herbs longer."
David L. · Miami, FL
★★★★★
"I used to just toss herbs in the fridge, but now I'm using the ice cube tray method for my excess dill and parsley. It's so convenient for cooking and ensures I'm not wasting any of my garden's bounty. Fantastic advice!"
Jessica M. · Denver, CO
Frequently Asked Questions
What's the absolute best way to store fresh basil to prevent it from turning black?
For fresh basil, the best method is to treat it like a bouquet of flowers. Trim the stems, place them in a glass with about an inch of water, and leave it on your kitchen counter at room temperature, away from direct sunlight. Do not put basil in the refrigerator, as the cold will cause it to blacken rapidly. Change the water daily for optimal freshness.
Is it better to wash herbs before storing them or just before using them?
Generally, it's best to wash herbs just before using them. Excess moisture can accelerate spoilage, mold, and bacterial growth. If you must wash them beforehand, ensure they are thoroughly dried using a salad spinner or by patting them with a clean paper towel before storage.
How do I store cilantro and parsley so they last longer than a few days?
Cilantro and parsley are tender herbs that benefit from a 'bouquet' method. Trim the stems, place them in a glass with an inch of water, and loosely cover the entire setup with a plastic bag. Store this in your refrigerator. Change the water every 1-2 days to keep them fresh for up to two weeks.
Are special herb storage containers worth the investment, or can I use regular household items?
While specialized herb storage containers can be effective, they are not strictly necessary. You can achieve excellent results using common household items like glass jars, plastic bags, and paper towels. The key is to understand the principles of moisture control and air circulation, which can be applied with either specialized tools or everyday items.
Can I store all fresh herbs in the freezer, and how does it affect their flavor and texture?
Most fresh herbs can be frozen, which is an excellent long-term storage solution. Freezing preserves their flavor well, making them ideal for cooked dishes like soups, stews, and sauces. However, freezing typically alters their texture, making them soft or limp once thawed, so they are generally not suitable for fresh garnishes or salads after freezing.
Who benefits most from learning how to store fresh herbs longer?
Anyone who cooks with fresh herbs benefits immensely, especially home cooks looking to reduce food waste, save money, and ensure their dishes always have vibrant flavor. Gardeners with an abundance of herbs, and individuals who buy herbs in larger bunches, will also find these techniques invaluable for extending their harvest or purchase life.
Are there any health risks associated with improperly stored fresh herbs?
Yes, improperly stored fresh herbs can develop mold or harbor bacteria like E. coli or Salmonella, especially if kept in overly moist or unsanitary conditions. Consuming such herbs can lead to foodborne illness. Always inspect herbs for signs of spoilage and discard any that appear slimy, moldy, or have an off smell to ensure food safety.
What are the emerging trends in herb preservation for the future?
Future trends in herb preservation are leaning towards more sustainable and high-tech solutions, including smart refrigeration systems that adjust humidity levels, advanced vacuum-sealing technologies for home use, and potentially biodegradable packaging infused with natural antimicrobial agents. There's also a growing interest in small-scale hydroponic systems for growing and storing herbs fresh on demand.
Stop wasting precious herbs and start enjoying their peak flavor for longer. By implementing these simple, expert-backed strategies on how to store fresh herbs longer, you'll transform your cooking, reduce waste, and always have vibrant ingredients at your fingertips. Dive in and make every meal a masterpiece!

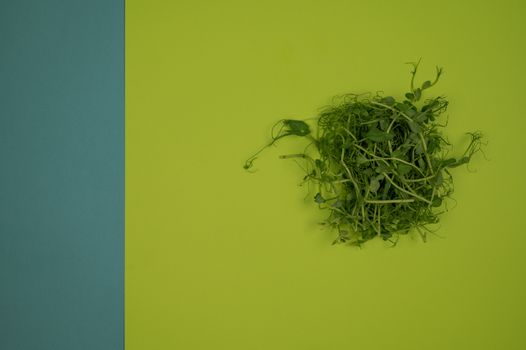 Photo: SHVETS production / Pexels
 Photo: Ella Olsson / Pexels
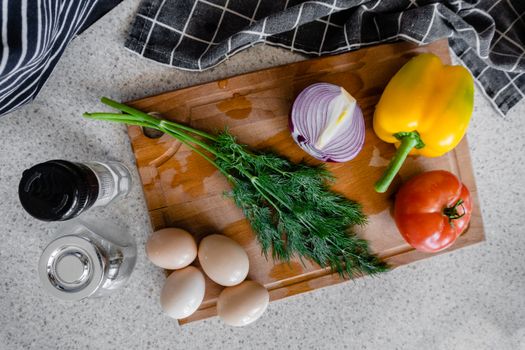 Photo: Max Bonda / Pexels