
How to Make Sourdough Bread Starter: Your Ultimate Guide
Unlock the secrets to crafting your own robust sourdough starter and bake artisanal bread at home.
Start Your Sourdough JourneyKey Takeaways
- ✓ Sourdough starter is a live culture of wild yeast and bacteria.
- ✓ It requires only flour and water to begin.
- ✓ Consistency and warmth are crucial for successful activation.
- ✓ A healthy starter will be bubbly and smell pleasantly acidic.
How It Works
Mix equal parts whole wheat flour and water in a jar. This initial mixture kickstarts the fermentation process.
Each day, remove most of the starter and feed the remainder with fresh flour and water. This cultivates a strong, active culture.
Watch for bubbles and a pleasant, yeasty aroma. Adjust feeding frequency and temperature as needed to encourage growth.
Your starter is ready when it consistently doubles in size within 4-8 hours after feeding. This indicates a robust and potent culture.
Understanding the Magic Behind Your Sourdough Starter
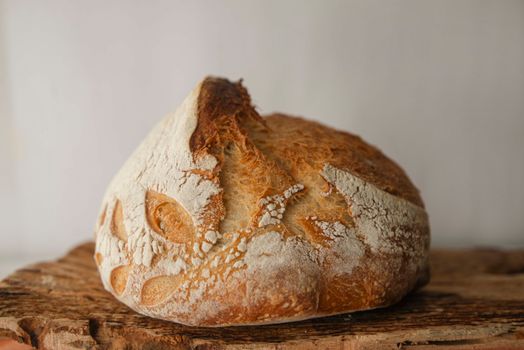 Photo: Natalia Olivera / Pexels
Gathering Your Essentials: What You Need to Begin
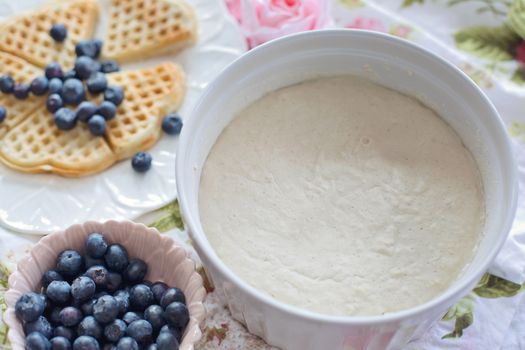 Photo: Jill Wellington / Pexels
The Day-by-Day Journey: Nurturing Your Starter to Life
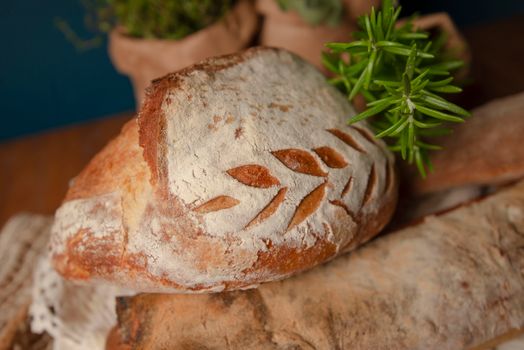 Photo: Natalia Olivera / Pexels
Troubleshooting Common Sourdough Starter Issues & Tips for Success
Photo: Jill Wellington / Pexels
Comparison
| Feature | Homemade Starter | Purchased Starter (Dried) | Commercial Yeast |
|---|---|---|---|
| Cost | Very Low (flour & water) | Moderate | Low |
| Time to Activate | 7-14 Days | 3-5 Days | Immediate |
| Flavor Profile | Complex, Tangy | Specific to Strain | Neutral |
| Digestibility | Improved | Variable | Standard |
| Maintenance | Daily/Weekly Feeding | Occasional Feeding | None (store dry) |
| Control over Culture | High | Medium | None |
| Learning Curve | Moderate | Low | Very Low |
What Readers Say
"This guide made learning how to make sourdough bread starter so approachable! My first attempt resulted in a bubbly, active starter within 9 days, and I'm already baking amazing bread."
Sarah J. · Austin, TX"I'd tried making a starter before and failed, but the detailed day-by-day instructions here were a game-changer. My starter, 'Bubbles,' is now thriving and makes the best loaves."
Mark T. · Seattle, WA"Following these steps, I successfully created a robust sourdough starter that consistently doubles after feeding. It's truly rewarding to bake bread from something I nurtured myself."
Emily R. · Denver, CO"The instructions were clear, though my starter took a bit longer than expected to get going. The troubleshooting section was incredibly helpful when I encountered some initial sluggishness."
David L. · Chicago, IL"As a complete beginner, I was intimidated by sourdough, but this guide on how to make sourdough bread starter broke it down perfectly. I now have a beautiful, active starter that I use for more than just bread, like pancakes!"
Jessica M. · Miami, FLFrequently Asked Questions
What is the best flour to use when learning how to make sourdough bread starter?
For the initial stages, whole wheat flour is highly recommended because it contains more nutrients and wild yeasts, which helps kickstart the fermentation process. Once your starter is established (around day 5-7), you can transition to unbleached all-purpose or bread flour for subsequent feedings.
My sourdough starter isn't bubbling; is it dead?
Not necessarily! A lack of bubbles often indicates a sluggish starter, not a dead one. Ensure it's in a warm environment (70-78°F), try feeding it more frequently (every 12 hours), and make sure you're using unchlorinated water. Patience is key; it can take up to two weeks for a starter to become consistently active.
How often should I feed my sourdough starter?
During the initial activation phase, you should feed your starter every 24 hours. Once it's active and established, if kept at room temperature, it benefits from daily feeding. If stored in the refrigerator, you can feed it once a week, but remember to bring it to room temperature and feed it 2-3 times before baking.
Is making a sourdough starter expensive?
No, making a sourdough starter is very inexpensive. It primarily requires only flour and water, which are common and affordable kitchen staples. The initial investment is minimal, making it a very cost-effective way to bake artisanal bread at home.
How does a homemade sourdough starter compare to commercial yeast?
A homemade sourdough starter is a live culture of wild yeasts and bacteria, offering a complex, tangy flavor and improved digestibility due to the fermentation process. Commercial yeast is a single, cultivated strain of yeast that provides a neutral flavor and faster rise, but lacks the depth and health benefits of sourdough.
Who should make a sourdough starter?
Anyone interested in baking artisanal bread at home, those looking for a more flavorful and digestible bread option, or individuals who enjoy a hands-on, rewarding kitchen project should consider making a sourdough starter. It's a great way to connect with traditional baking methods.
Can a sourdough starter go bad or become unsafe?
While a healthy sourdough starter is resilient, it can go bad. The main signs of spoilage are visible mold (any color other than white), a strong, unpleasant smell (like nail polish remover or rancid cheese), or pink/orange streaks. If you observe these, it's best to discard the starter and begin again to ensure food safety.
What are the future trends in sourdough baking?
Future trends in sourdough baking are leaning towards exploring diverse grain flours (e.g., ancient grains, locally milled flours), experimenting with different hydration levels for unique crusts and crumbs, and integrating sourdough into a wider range of baked goods beyond traditional bread, such as pastries, cookies, and even savory dishes.
Now that you understand how to make sourdough bread starter, it's time to embark on your own baking adventure. With patience and these detailed instructions, you'll soon be enjoying the incredible flavor and satisfaction of homemade sourdough. Start your starter today and transform your kitchen into a bakery!